We use cookies in this website. Read about them in our privacy policy. To disable them, configure your browser properly. If you keep using this website, you are accepting those.


Educational-Robotics-with-Halocode-by-Makeblock (2)
806 views
0 Likes
0
0
Share on Social Networks
Share Link
Use permanent link to share in social mediaShare with a friend
Please login to send this document by email!
Embed in your website
Select page to start with
2. 2
4. 4
14. 14 Its structural parts, made of reinforced aluminum, are designed so that they can be assembled easily, providing stability, which allows to build all kinds of robots, 3D printers, CNC machines, etc. The easy and solid union of the pieces makes assemblies very simple and adapts to practically any project you can imagine. These robots are based on the popular Ardu ino platform, so it can be programmed and controlled from a PC, either through a USB or Bluetooth connection . Since current electronics are not simple (connections and circuit design are the main barrier), Makeblock has designed its own electronic modules called "Me", with a very simple way of interconnecting them through RJ25 connectors, marked with codes of colors , so make any robot become a simple "plug and play", focusing on robotics . Makeblock has a wide range of Me sensors and actuators: bluetooth, po tentiometer, infrared receiver with remote control, proximity sensors, motors, lights, smoke sensors, LED strips, etc. In the following sections we describe the ma in Makeblock maker line features .
30. 30 Once this change is made, the component can be directly connected to the Halocode board (G with GND, V with 3V and S with 0, 1, 2 or 3), as shown in the image. It is important to keep in mind that the crocodile clips do not make contact with each other or with other components of the board since; otherwise, it could be damaged. Although mBlock5 programming environment does not have a specific block to m anage these components, generic blocks are available for reading and writing, both analog and digital values, on the board pins . In the following sections we discuss the sensors and actuators of other manufacturers that are used in the projects in this book.
50. 50 By default Codey is marked, but if you wish you can work with other Makeblock robots, such as mBot , Ranger or Halocode , or even with other manufacturers' boards such as micro:bit. By clicking on the box that contains the plus sign, a new scr een appears with the available robots and boards : In this case, click on the Halocode icon to select this device. Next, in order to load a program, Halocode must be connected to the PC, either through the USB port or the Bluetooth module.
88. 88
92. 92
100. 100
107. 107
108. 108
120. 120
124. 124
125. 125
132. 132 In this project it is necessary to take care that the clamps connected to the power and ground pins do not make contact with any other element of the board. The structure described in section 2.9.2 helps reduce this risk:
139. 13 9
159. 159
1.
8. 8
126. 126
146. 146 In this project it is necessary to take care that the clamps connected to the power and ground pins do not make contact with any other element of the board. The structure described in section 2.9.2 helps reduce this risk:
150. 150
155. 155
115. 115
140. 140 In this project it is necessary to take care that the clamps connected to the power and ground pins do not make contact with any other element of the board. The structure described in section 2.9.2 helps reduce this risk:
143. 143 In this project it is necessary to take care that the clamps connected to the power and ground pins do not make contact with any other element of the board. The structure described in section 2.9.2 helps reduce this risk:
151. 151 In the projects that are added components it is necessary to take care that the clamps connected to the power and ground pins do not make contact with any other element of the board. The structure described in section 2.9.2 helps reduce this risk:
156. 156 In the projects that are added components it is necessary to take care that the clamps connected to the power and ground pins do not make contact with any other element of the board. The structure described in section 2.9.2 helps reduce this risk:
24. 24 1.5 .1. - STEAM Philosophy STEM, without the A, is the acronym of the names of four academic disciplines: Science, Technology, Engineering and Mathematics Educational initiatives or projects oriented towards the STEM philosophy aim to combine these four subjects to develop an interdisciplinary approach to the teaching and learning process, also incorporating contexts and situations of daily life, and using the necessary technological tools. The Europea n Commission bet decidedly by this methodology, as evidenced by the more than 13 million euros that it planned to devote in the period 2014 - 2020 t o subsidize initiatives aimed to increasing the attractiveness of scientific studies and the interest of young people in the STEM philosophy. However, despite the projection of this philosophy, the reality is that since the beginning of the 2000s there has been a considerable decline in the proportion of students in STEM disciplines, something that contrasts with the growing demand for this type of profiles in the labor market. M ore recently , there has been a change in trend in STEM actions, possibly due to the rise of the maker philosophy and do - it - yourself (DIY) movements, as well as the inclusion in the educatio nal field of promotion of creative thinking and work based on more competent and productive activities. On the other hand, it is evident that the combination of STEM disciplines when carrying out projects, requires incorporating an original, attractive and efficient design, as reflected in the r ise of the "maker", DIY (do - it - yourself) and DIWO (Do i t with others) philosophies , that have shown that only when artistic and creative skills are combined with STEM education, aspects such as innovation and design, the development of curiosity and imagination are valued, the search for diverse solutions to a single problem. A ll of which has led to the natural incorporation of the A of "Arts" to the acronym STEM, giving rise to STEAM: Science, Technology, Engineering , Mathematics & Arts, a methodology that, without having assigned a name or an acronym, many technological teachers already used for a long time .
35. 35 The quality and power are what you can expect from this type of device, much lower than a speaker. Even so they are apt for infinity of applications, even musical, for which it is relevant to know the relation between the notes and their frequen cies . It is a binary di gital actuator so it can be only connected on Halocode board pins 0 or 1 , in similar way as described in section 2.2.1 mBlock5 current version does not have any specific block to manage this type of component, so you have to use the direct write blocks to the digital pins. To make a buzzer sound, it is necessary to quickly change its status between "on" (1) and "off" (0). The faster the state changes, the higher the frequency. 2. 4 .2. - Rel ay A relay is a device similar to a switch but, instead of manually - operated , it is operated by a digital signal to turn it on or off. In this way, with a low voltage signal, you can control the operation of equipment that works at 220 volts. It is therefore the key element to use robotics in home automation proje cts (domotic) . Presently they are solid type, known as "SSR" (solid state relay), and the element that makes the switch is an optotransistor formed by an LED that when the control signal is set to 1 emits light that, when received by a photoresist, allows electrical courrent passes through the controlled circuit. A relay completely isolates the control circuit (robotics) from the power circuit (controlled equipment), thus protecting the board and control elements. The relays can have one or several channels. Each channel is used to control the operation of a device. In this book we use single - channel relays.
41. 41 2. 8 . - Power supply To operate, the Halocode board needs power, either through the USB connector or the side connector. In the case of the USB connector, the power supply can be the computer to which we have connected it or an external battery equipped with this type of connector: If batteries are used, they should be between 3 and 5 volts. In the market there are batteries of all sizes and capacities. For certain projects, such as
71. 71 3. 6. 7.4. - Condition actions (If) This block allows to condition the execution of a group of instructions. Precisely in the previous section we saw an example that included a conditi onal block "If ". The condition can be the state of a sensor, such as a button. You can also combine operators to check if the value returned by a sensor is equal, less or greater than a certain value. In the next program, when the volume measured by the microphone is greate r than 50, LED 1 will light red.
72. 72 In section 3. 6. 8 (Operators), all the operators that can be used to determine the condition are detailed. 3. 6. 7.5. - Condition actions to a condition and to the opposite This block allows to condition the execution of a group of instructions to a condition (If) and a seco nd block of instructions to the opposite condition (Else) . The condition can be the state of a sensor, such as a button. In the following program, if the volume measured by the microphone is greater than 50, LED 1 will light red and, else, green. In section 3. 6.8 (Operators), all the operators that can be used to determine the condition are detailed.
80. 80 When selecting this group, the option to create a new block appears, as well as the list of blocks that you have already created for the program that is being edited. The next function waits for the user to press and release the button, confirming the pulsation with a flash of the LEDS. 3. 6. 1 1 .1. - Create a Block A function is a set of instructions that perform a specific task, usually returning a result. They are, therefore, small programs within programs. They serve to avoid having to repeat the same instructions throughout the program.
82. 82 extension has been added, a trash can appears instead of the plus sign in case you want to delete the mBlock5 extension. 3.7. - mBlock5 to Python translation mBlock5 environment allows the automatic translation of the program in blocks to Python. To do this, simply click on the "</>" symbol that appears in the right margin of the programming area, dividing it into two areas:
106. 106
135. 135 In this project it is necessary to take care that the clamps connected to the power and ground pins do not make contact with any other element of the board. The structure described in section 2.9.2 helps reduce this risk:
111. 111 Program developed with mBlock5
154. 154 Program developed with mBlock5
93. 93 4.1.5. - Rotating Emergency vehicle lighting See the full book “Educational Robotics with Halocode” from the same author.
123. 123 Program developed with mBlock5
19. 19 1.3.3.1. - Codey Codey is the brain of the robot that, in addition to the processor, integrates more than 10 electronic modules that can be controlled by program . The processor, an ESP32, is a SoC (System on Chip) designed by the Chinese company Espressif and manufactured by TSMC. Integrates a Tensilica Xtensa dual - core 32bits at 160Mhz processor , WiFi and Bluetooth connectivity in a single chip. Since it has a pro cessor, it allows the load of a program in its memory to work autonomously. The loading of the program can be done either from the Makeblock App or from mBlock5. 1.3.3.2. - Rocky Rocky is the vehicle that gives Codey mobility. It has integrated, in addition to the motors that move its tracks, other sensors and a connector for Neuron modules, which further expands its possibilities.
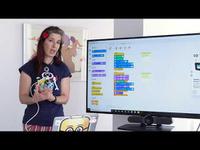
46. 46 3. - Programming with mBlock5 Halocode can be programmed with mBlock5, available for PC and Mac, a tool developed by Makeblock. It is based on Scratch3, so it uses blocks that fit together, as if it were a puzzle, to build programs. This helps to make programming accessible to children, because they do not have to worry about syntax (they do not need to learn how to write code in a literal programming language such as Processing, C ++ or Java). Being a product developed by Makeblock, it is constantly updated and allows to use the full range of sensors and actuators of the brand. At the time of writing this book (February 2019) version 5.0.1 of mBlock5 had just been released, both for Windows and for Mac, which can be d ownloaded for free from the URL: https://www.makeblock.com/software The Web version is also available, which makes it possible to use mBlock5 from any site and with any device through a browser (provisionally at https://ide.makeblock.com/#/ ) 3. 1 . - Initial screen of mBlock5 When launching mBlock5 , the following screen appears:
65. 65 3. 6. 4 . 4 . - Use the voice recognition text result This block allows you to use the result of speech recognition to, for example, assign it to a var iable: It is important to keep in mind that voice recognition is able to translate any word or phrase into a text, either in Chinese or English, correctly pronounced. The returned text always ends with a period. Later this data can be used to condition actions, such as turning on the LEDs if "lights on" has been said: 3. 6. 4 . 5 . - Send a message to the user's cloud This block allows you to send a message to the user's cloud. This message will be receiv ed by all Halocode bo ards connected to the same user account, regardless of their location.
96. 96 Program developed with mBlock5
97. 97 4.1.7. - Kids night light See the full book “Educational Robotics with Halocode” from the same author.
119. 119 Program developed with mBlock5
131. 131 Program developed with mBlock5
149. 149 Program developed with mBlock5
3. 3 Educational Robotics with Haloc ode by m akeblock Summaris ed Edition
44. 44 fix additional components, such as the PIR sensor that appears in the image. On the other hand this structure offers an adequate grip of the crocodile clips of power and ground, preventing them from making contact with o ther pins or components of the bo ard, which could cause a short circuit and damage it. Likewise, the m etal screws with which the board is fixed to the structure also serve to fasten the crocodile clips of the signal cables simply and safely. To fix the components we propose this simple and practical solution that also prevents it from moving or turning. As you can see, we use nylon 3 metric screws to avoid false contacts. 2. 9 .3. - W areable technology The term wareable refers to the set of devices and electronic devices that are incorporated in any part of the body or clothing, interacting continuously with the user and with other devices in order to perform a specific function.
56. 56 In the projects of this book it is usual to use this block in the following way: 3. 6. 1. 8 . - Turn on a specific LED specifying RGB values This block allows you to turn on a specific LED by specifying the value of each of the three component colors (red, green or blue). Indic ating the values 0 the LEDS turn off. Instead of the values, variables can be used. In the projects of this book it is usual to use this block in the following way: 3. 6. 1. 9 . - Turn off a specific LED This block allows you to turn off a certain RGB LED. A variable can be used instead of the LE D number. 3. 6. 1. 10 . - LED ring shows a percentage value This block allows you to use the Halocode LEDS ring as if it were an analog indicator to show percentage values.
60. 60 The gyroscopes sensors are suitable for determining instantaneous and small magnitude turning angles, but they are not suitable for determining angles of rotation over time or of great magnitude. 3. 6. 2 .12. - Obtain the r otation ang le with respect to the Y axis This block allows to obtain the rotation angle of the internal gyroscope of Halocode with respect to the Y axis, which corresponds to the a ngle of inclination of the board to the left or right. It is usually used to assign it to variables or condition actions. The gyroscopes sensors are suitable for determining instantaneous and small magnitude turning angles, but they are not suitable for determining angles of rotation over time or of great magnitude. 3. 6. 2 .13. - Obtain the rota tion angle with respect to the Z axis This block allows obtaining the rotation angle of the Halocode internal gyroscope with respect to the Z axis, which corresponds to the rotation angle of the bo ard on itself. Towards the left the values grow, while to the right they decrease. It is usually used to assign it to variables or condition actions. The gyroscopes sensors are suitable for determining instantaneous and small magnitude turning angles, but they are not suitable for determining angles of rotation over time or of great magnitude. 3. 6. 2 . 14 . - Reset the rotation angle of an axis This block allows you to reset the rotation angle of the internal Halocode gyroscope with respect to an axis or all of them. T he Halocode gyroscopic sensor presents the errors of this type of sensors. With this block the value of the angle of rotation is reset to zero, although this does not mean that Halocode recovers its initial orientation.
73. 73 3. 6. 7.6. - Wait until a condition is met With this block the execution of the program stops until the expected event occurs. In the following example, the program waits for the button to be pressed, after which LED 1 will light up in green: 3. 6. 7.7. - Repeat until a condition is met This block repeats the execution of a group of instructions until a condition is met. In the following example LED 1 will flash green until the button is pressed: 3. 6. 8 . - Operator s This group includes all the blocks that allow to perform mathematical operations , logical operations, comparisons , arithmetic functions, etc .
87. 87 Program developed with mBlock5
158. 158 5 . - Further material On the full book “Educational Robotics with Halocode” etition, from the same author, you will find a voucher to download the the complete collec tion of the programs corre sponding to the projects of that book in mBlock5 format.
5. 5 Ernesto Martínez de Carvajal Hedrich Management IT Advanced Technician Internet and e - Commerce Consultant (UAH) Computer Science Judicial Expert Computer Science Judicial Expert Spanish Association Member First LEGO League Coach T eacher Training in Obligatory S econdary and Upper Secondary School Education and Vocational Training (UNIR) Degree in Maritime Navigation and Transport (FNB) Ma ster Shipping Business Merchant Navy Pilot Maritime Surve yor (COMM E ) Flight Crew Member UL M Advanced RPAS Pilot Civil RPAS Operator AESA www. emchtechbooks.com Educational Robotics with Haloc ode by m akeblock Summarised Edition
49. 49 A rea Descrip tion Top menu Stage Execution menu Submen u B oard s election and connection E dition comands Programming command groups Programming commands of the selected group Programming area The following sections describe the different areas of the graphic environment mBlock5, although we will start with the selection and connection of the board since the environment is adjusted to the selected plate. 3. 2 . - Board selection and connection In the lower left corner of the mBlock5 environment appears a box with three options (Devices, Objects and Background). By clicking on Devices, the selected ones are shown:
67. 67 3. 6. 5 .2. - Send a message to the local network This block allows you to send a message to the local network. For example, the message "Detected noise " can be sent when the root board detects a high volume: 3. 6. 5 . 3 . - Send a message with a value to the local network This block allows sending a message with a value to the local network. For example you can send the message "Detected Noise ", along with the volume, when the root board detects a high volume: 3. 6. 5 .4. - Event receive message from the user's cloud (LAN) This block allows grouping a set of actions to be performed when a message is received from the user's cloud. 3. 6. 5 .5. - Use the value associated with a message This block allows you to use the value associated with a message, as if it were a variable .
43. 43 F rontal view Back view The result considers that, besides being functional, it contributes the artistic component required in the STEAM projects, offering absolute freedom to the user to quickly adapt the structures to their liking and to
157. 157 4.4.5 . - Automatic watering See the full book “Educational Robotics with Halocode” from the same author. 4.4.6 . - Alarm of presence with remote control See the full book “Educational Robotics with Halocode” from the same author. 4.5. - Real home automation with Halocode See the full book “Educational Robotics with Halocode” from the same author.
40. 40 Facilitates the further development of the program. A typical example of commonly used pseud ocode is a food recipe, but it can be applied in any activity or process. This would be the pseudocode for the subsequent development of a program that is able to calculate the area of any rectangle: While not pressing the X key Ask the user the base length Ask the user the height length Rectangle area = Base length x length height Display Rectangle a rea Ask the user to press any key to continue o r X to end All the projects in this book include the pseudocode of the algorithm that is then programmed in mBlock5 although the pseudocode could be used to develop the program in any other platform. 2. 7 .3. - Programming Finally, it remains to write the program from the pseudocode, for which the programmer must know the specific programming language to be used. In section 3 the programming resources available in mBlock5 are described. 2. 7 .4. - Programming by functions When solving a problem, it is always better to divide it into smaller problems, which will be easier to solve. In programming, the same thing happens, so regardless of the programming environment or language used, it is always better (if possible) to split the program into functions that perform simple and specific tasks. We will touch on this question later.
42. 42 the watch, the ideal th ing is to feed the Halocode board with a small bat tery that we can fix to its back side by means of velcro: Halocode board powered by 3.7 volt LIPO batteries Just after receiving power, the Halocode board will start and run the program that has loaded in its memory. 2. 9 . - Structural parts At the moment the Halocode board does not have additional structural components. However, as we will see it is very easy to combine it with LEGO pieces. 2. 9 .1. - Modding Pc As usual in the books of this author, a faithful follower of the STEAM philosophy, the A (A rts) will be taken into account, which, in this occasion, will be oriented towards the so - called "Modding Pc", a design style that takes into account the strength, originality and functionality, that when applied to the PCs, an d in this case the Halocode b oard will derive in models that leave the components exposed. 2. 9 .2. - L EGO Technic parts As in other literary works by this author, we have chosen to use LEGO pieces from the Technic series to quickly and easily create very modding designs.
7. 7 PROLOGUE Again, Makeblock surprised us pleasantly with a quality product with very interesting features th at clearly differentiate it from other similar options . Halocode is a programm able board with multitude of sensors , which can be used for both “training in robotics ”, from basic to the most advanced leve ls , as well as for “ training with robotics ”, by allowing the youngest members to use it as a didactic resource for all kinds of activities, including, of course, the introduction to robotics. Although other similar proposals already exist in market , the new Halocode is notable for its ability to carry out extre mely easily projects related to voice recognition, for example, controlling lights remotely , just like domestic assistants do , so much in vogue now, or send voice messages translated to text from a Halocode to anywhere in the world . This functionality also allows to carry out activities for, for example, learning English numbers. Its circular structure and the ring LEDS arrangement, invites us to carry out IoT proj ect s, as the watch from book cover , that we are sure will shake up the wareable lovers. Finall y, I want to express my gratitude to all the people who have helped me in this work and , as usual , I apologize for the possible mistakes that might have been made . The only way to avoid them would have been leaving blank paper and that , a s my readers know well , it is never an option . The aut h or.
63. 63 3. 6. 3 .5. - Write an analog value in a pin This block allows you to write an analog value (between 0 and 1023) in any of the 4 Halocode pins. Writing the analog 1023 value is equivalent to writing the value 1 in binary mode. 3. 6. 3 .6. - Move a servo This block allows to move a servo, connected to the pin indicated in the block, to a certain position, indicating an angle between 0 and 180. 3. 6. 4 . - Wi - Fi This group includes blocks destined to manage WiFi communication, either to make use of voice recognition or to co mmunicate two or more Halocode bo ards. These blocks can only be used in "Up load On" mode . Voice recognition is based on Microsoft Cogniti ve Services, that is, the Halocode board records the voice message and sends it to the Microsoft server so that it translates the voice file into text. Therefore, it will only be possible to use voice recognition if Halocode is first connected to a WiFi ac cess point that also has an Internet connection, and the user has logged in to his makeblock.com account . The communication between bo ards is done at the level o f "user code", that is, any board with Internet access connected in the same user account can e xchange messages with each other, regardless of their physical location. 3. 6. 4 .1. - Connect Halocode to a WiFi hotspot This block allows to connect the Halocode board to a WiFi access point, indicating the name (SSID) and the access key WPA / PSK of the access point.
81. 81 This option allows you to create a new block. When selecting a window opens to indicate the name. Many programming languages do not allow a function and a variable with the same name in the same program. A good way to avoid this situation is to have all the functions start with the letter F, as can be seen in the image of the previous point where we created the function FWaitForKeyPress. The functions can have input parameters, which allo ws to pass data to said function. These input parameters are indicated when creating or editing the function and can be of different types: numeric (Number), te xt (Text) or logical (Boolean). 3. 2 . 1 2 . - Extension s At the bottom of the programming block palette appears an option that allows you to manage the extensions available for mBlock5. At the time of writing this book in mBlock5 there were no ex tensions available for Halocode. Accessing to the extension manager only appears the text “Coming Soon... ” Once there are extensions available, to add any of them, it will be enough to click on the plus sign that will be below each extension. Once an
6. 6 For orders : Phone : 00 34 93 751 21 82 email: [email protected] 1 st edition full book : February 2019 1st edition derivative English book version : May 2019 1st edition derivative English book summaris ed version : May 2019 © Ernesto Martínez de Carvajal Hedrich LEGO, Mindstorms, NXT and EV3 are trademarks from The LEGO® Group. Makeblock and Neuron are trademarks from Makeblock Co., Ltd. Arduino is trademarks from the Arduino Foundation . ISBN 13: 978 - 84 - 09 - 11733 - 8 Printed in España – Impreso en España All rights reserved. This is a derivative work from the Spanish book “Robótica Educativa con Halocode de Makeblock” from the same author. No part of this publication may be reproduced, stored in a retrieval system, stored in a database and / or published in any form or by any means, electronic, mechanical, photocopying, recording or otherwise, without the prior written permission of the publisher.
116. 116 4.1.21. - Drop See the full book “Educational Robotics with Halocode” from the same author. 4.1.22. - Bubble level See the full book “Educational Robotics with Halocode” from the same author. 4.2. - Halocode and speech recognition This section includes several projects in which the voice recognition function is used, thus entering the exciting world of Artificial Intelligence. Just recently, various proposals for domestic devices that can be controlled by the voice have arrived to the market, something that undoubtedly attracts a lot of attention but, as we will see below, it is extremely easy to do thanks to the facilities that companies, like Microsoft, offering to users through Cognitive Services, a set of t ools, supported by Microsoft Azure, that make use of artificial intelligence to solve situations in which large data analysis or complex algorithms are required, such as the case of facial recognition or speech recognition. The resources to be able to use these cognitive services from Microsoft are available on https://github.com/topics/microsoft - cognitive - services, although in our case it will be enough to use two mBlock5 programming blocks. 4.2.1. - Turn LEDS on and off with voice See the full book “Educat ional Robotics with Halocode” from the same author.
66. 66 3. 6. 4 . 6 . - Send a message with a value to the user's cloud This block allows sending a message with a value to the user's cloud. This message, along with its value, will be received by all the Halocode boards connected to the same cloud. 3. 6. 4 . 7 . - Event receive message from the user's cloud (WiFi) This block allows grouping a set of actions to be performed when a message is received from the user's cloud. 3. 6. 4 . 8 . - Use the value associated with a message This block allows you to use the value associated with a message, as if it were a variable: 3. 6. 5 . - LAN This group includes the blocks destined to manage a WiFi wireless local network between Halocode boards to exchange messages and data between them. 3. 6. 5 .1. - Activate the local network The first step to be able to use a local network is to activate it, either as root (master) or node (slave). In a local netw ork there can only be one root bo ard, while there i s no limit in terms of node bo ards.
68. 68 3. 6. 6 . - Event s This group includes blocks associated with events. 3. 6. 6. 1. - When pressing the green flag This block is placed at the beginning of the main loop of the program in NO UPLOAD mode. Pressing the green flag starts the execution of said loop. If you put more than one block of this type, all will run in parallel when you start up Halocode. Since Halocode does not have a screen, we recommend working in "no upload" mode to check the values of the variables and to debug the programs, since in this way we can visualize the variables in mBlock5 stage . 3. 6. 6. 2 . - When Halocode turning on This block is placed at the beginning of the main loop of the program. When Halocode is started, the execution of said loop begins. If you put m ore than one block of this type, all will run in parallel when you start up Halocode. 3. 6. 6. 3. - When button is pressed Pressing the button starts the execution of the block. 3. 6. 6. 4 . - When Haloco de is shaking When shaking Halocode starts the execution of the block.
39. 39 2. 7 .1. - Algorithm An algorithm is a set of well - defined, ordered and f inite instru ctions or rules that allows to carry out an activity following the steps indicated. They must be complete and should not generate doubts about the purpose of each of these steps, regardless of whether the reader may not kn ow how to put it into practice. In daily life, algorithms are used constantly, most of the time unconsciously, to solve problems or execute actions. A typical example is to solve a problem with a light bulb. It is highly recommended to be clear about the algorithm before starting to create the program. 2. 7 .2. - Pseudocode The pseudocode is an informal, although accurate, high - level description of an algorithm, which essentially uses natural language together with some syntactic conventions of programming languages, such as assignments, cycles and conditional, although it is not governed by any standard. It is used to describe algorithms and as an intermediate element during development, with the great advantage that it requires little extension. The pseudocode is designe d to make it easier for people to understand an algorithm, and therefore can omit irrelevant details that, nevertheless, are necessary in the later development of the program. The main characteristics of this language are: It is a simple form of representa tion to use and understand. It facilitates the passage of the program to the programming language. It is independent of the programming language that will be used.
64. 64 Once the connection is established, the rest of the mBlock5 blocks related to WiFi communication can be used. 3. 6. 4 .2. - Check WiFi connection This block allows you to check if the WiFi connection between Halocode and the WiFi access point has been established. Normally this block usually follows the one seen in the previous section, so that the execution of the program will wait until the connection has been established: 3. 6. 4 .3. - Text recognition This block performs the following actions: Record a voice file during the indicated seconds. Send the voice file to the Microsoft server so that it is translated into text based on the selected language (currently only Chinese and English are available). Wait to receive the text. The normal thing is that the voice recognition is executed based on a user action, such as pressing the button:
33. 33 2. 2 .5 . - PIR sens or The acronym PIR corresponds to "Passive InfRared", a type of sensor that measures the infrared (IR) light emitted by the objects that are in its vision field . One of the most common applications of this type of sensors is motion detectors, either in ala rm systems or in automatic lighting systems . The term passive refers to the fact that PIR devices do not generate or radiate energy to achieve detection, but operate exclusively on the basis of the energy emitted by the objects. On the other hand, it is important to keep in mind that PIR sensors do not detect or measure "heat", but the infrared radiation emitted by an object, although this is usually proportional to the temperature of the object. For this reason, detectors based on PIR sensors can also b e activated by the movement of hot objects. It can be used for the detection of people and animals, within a range of action of about 5 meters and a beam of 90 ° opening. If something hot moves within that range the sensor activates the digital output to 1. Once activated it takes a few seconds to return to 0. It is a binary digital component so it can be connected to any of the pins on the Hal ocode board, similar as described in section 2.2.1. 2.2.6. - Flame s ensor The flame sensor is based on an infrared light receiver that is extremely sensitive to the specific wavelength that flames emit (around 760nm), although they can give false positives with certain lights. Although it is intended to detect flames, it must be taken into account that it only supp orts temperatures of up to 85 degrees Celsius, so it must be kept at an adequate distance from the flame. It is a binary digital component so it can be connected to any of the pins on the Hal ocode board, similar as described in section 2.2.1
38. 38 2. 6 . 1 . - F irmware update The firmware is the non - volatile software (it is not erased when the Halocode is turned off) that controls the basic functions of an integrated circuit (chip). Sometimes the firmware has to be updated, either to solve operating problems or to add new functionalities. 2. 6 . 1 . 1 . - Halocode firmware update By connecting a Halocode board to the computer and accessing the mBlock5 programming environment, it automatically checks if a firmware update is available , in which case it offers the user the possibility to update it. Once the update process is started, it must be avoided that it can be interrupted. 2. 7 . - Program A computer program is a set of instructions for a processor to perform a series of specific ta sks. Without programs, computers are not capable of any action. The general set of programs is called software. When talking about programs differentiation should be made between the source and the executable code . It is called source program or source code to the written by the programmer in a particular programming language, more or less close to human language . Halocode has its own graphical programming environment for PC and Mac called mBlock5 , very friendly and intuitive. As soon as the program load is finished, its execution begins. Since, just like the Arduino boards, Halocode can only contain one program in its memory, when it is loaded, it replaces the one that had previously .
69. 69 3. 6. 6. 5 . - When Halocode is tilted When Halocode i s til ted to the indicated side starts the execution of this block. 3. 6. 6. 6 . - When the timer exceeds a value This block will be executed when the internal timer exceeds the indicated value. 3. 6. 6. 7 . - When microphone loudness greater than a value Th is block will be executed when the intensity sound detected will greater than the indicated value. 3. 6. 6 . 8 . - When receiving a message This block will be executed when receiving a message . 3. 6. 6 . 9 . - Send a me s sag e This block allows you to send a message or a "new message".
70. 70 3. 6. 7 . - Control This group includes all the blocks that allow controlling the execution flow of the program. 3. 6. 7.1. - Waits for a time This block allows waiting times to be included in the program, whether fixed or variable. Wait 1 second Wait for the second contents in the variable Time 3. 6. 7.2. - Repeat a certain number of times With this block we can make a set of instructions run repeatedly a certain number of times. In the following example the LED will flash 10 times in red. 3. 6. 7.3. - Forever loop With this block we can make a set of instructions run indefinitely. Normally it is only used in the main program loop.
62. 62 higher than 512 will be ide ntified as 1 and lower values as 0, as shown in the example in the next section. 3. 6. 3 .2. - Read the value of a pin in digital mode This block allows you to check the digital (binary) value of any of the 4 pins. It is usually used to assign this value to a variable. Pins 0 and 1 are identified as digital (D), while pins 2 and 3 are identified as analog (A). However, all analog pin can be read as digital, since values higher than 512 will be identified as 1 and lower ones as 0, as shown in the example executed in "no upload" mode to display the values of the variables. If, for example, we connect a button on pin 3 (which in principle is an analog pin), when we press it D3 will be 1 and, otherwise, it will be 0. 3. 6. 3 .3. - Read the value of a pin in analog mode This block allows you to check the analog value of any of the 2 analog pins (2 and 3). It is usually used to assign this value to a variable. 3. 6. 3 .4. - Write a binary value in a pin This block allows you to write a binary value (0, 1) in any of the 4 Halocode pins. Writing a binary 1 is equivalent to writing the value 1023 in analog mode.
54. 54 The block itself allows access to a drop - down menu to select one of the available patterns: Rainbow All the LEDs light up and a transition of the colors of the rainbow occurs. Spindrift All LEDs turn blue and then a group of white LEDs rotates until the circ le is completed. Meteor Similar to the previous one but at a higher speed and two rounds are completed. Firefly At random, the LEDs are switched on and off progressively. The execution of the program stops until the pattern is completed. Since it is a very specific Halocode block , we do not use it in the projects in this book . Instead we use more usual programming blocks. 3. 6. 1.2. - Shows a pattern of colors With this block a c olour pattern will be permanently displayed. Each position of the block corresponds to one of the 12 LEDS. Since it is a very specific Halocode block , we do not use it in the projects in this book . Instead we use more usual programming blocks. 3. 6. 1. 3 . - Show a c olour pattern from a position With this block a c olour pattern will be permanently displayed from the LED indicated in the parameter. Each position of the block corresponds to one of the 12 LEDS. Since it is a very specific Halocode block , we do not use it in the projects in this book . Instead we use more u sual programming blocks.
57. 57 It allows to indicate a fixed value or, what is more useful, a variable. A value of 50 lights t urn on half of the LEDS , while a value of 100 lights all of them. On the other hand the LEDS are going on in a scale of colors. 3. 6. 2 . - Sensing This group includes the blocks used to manage the sensors integrated in the Halocode board. 3. 6. 2 .1. - Check the button status This block is used to check if the button is pressed. It is usually used to condition actions. 3. 6. 2 .2. - Get the volume value of the ambient sound This block is used to obtain the value of the sound sensor. It is usually used to assign this value to a variable or to condition actions. 3. 6. 2 . 3 . - Check the contact sensor status This block is used to check the status of one of the 4 Halocode contact sensors. It is usually used to condition actions. 3. 6. 2 .4. - Get the value of a contact sensor This block is used to obtain the value of the specified contact sensor. It is usually used to assign this value to a variable or condition actions.
61. 61 3. 6. 2 . 15 . - Read the value of the internal timer All the processors have an internal timer with which it synchronizes all the components and the operations that are carried out. When starting Halocode, the timer is reset to zero. This block allows you to read the value of the internal timer, either to assign it to variables or to condition actions. As we will see, in programs you can use the value of this stopwatch to control precisely the passage of time. 3. 6. 2 . 1 6 . - Restart the timer This block allows you to reset the internal Halocode timer. 3. 6. 3 . - Pin s This group includes the blocks used to manage the four connection pins (0, 1, 2 and 3) of the Halocode board . 3. 6. 3 . 1 . - Check the value of a pin in digital mode This block allows you to check the digital (binary) value of any of the 4 pins. It is usually used to condition actions. Pins 0 and 1 are identified as digital (D), while pins 2 and 3 are identified as analog (A). However, all analog pin can be read as digital, since values
94. 94 4.1.6. - SOS signal light SOS is the most widely used international distress signal since it was approved during an international conference in Berlin in 1906, to replace the previously used "CQD" in telegraphic transmissions in Morse Code. Although Morse code is no longer used today, the SOS signal remains in effect. This representation was chosen because it could be easily remembered and broadcast, whether by sound, visual, radio, etc. It consists of a sequence of three short pulses (S), three long (O) and three short (S), although it is transmitted continuously, without separating each letter. Po pularly it is assigned different meanings like "Save Our Ship", "Save Our Souls", or "Send Out Succour", but the reality is that is not the acronym of anything. Objetive Complexity Make Halocode emit the visual signal corresponding to the Morse SOS code. The button will be used to alternately activate and deactivate it. Time 15’ Program: medium
36. 36 Each channel has 3 terminals to connect the circuit you want to control. One of the cables is connected to the central terminal, which is common to the other two, and the other cable will be connected to the NO (Normally Open) or NC (Normally Close) terminal depending on whether you want the idle state to be open (disconnected) or closed (connected) . The most comm on is to connect it to the NO (No rmally Open) so the normal state of the controlled equipment is turned off. The pins associated to each channel of the relay are connected directly to a digital pin of the Arduino board (we use only free prototyping board s ) and the terminals to the positiv e and negative cables of the electrical circuit that we want to control. By writing a 1 (high value) on the digital pin to which we have connected the relay, it will be activated, closing the circuit and, in this ex ample, turning on the light LED . Writing a 0 (low value) the relay will deactivate and open t he circuit, turning off the LED . In section 4.5 of the full book a domotic project is carried out using safe currents of maximum 25 volts. 2. 4 .3. - F luid pump It is a 3V vertical submersible pump that can be used for all types of projects. Opt ionally you can use the Makeblock pump , with similar characteristics (see project 4.4.5 of the full book ), although it is not submersible. Both are controlled indirectly through a relay (see previous section).
79. 79 3. 6. 9 .3. - Assign a value to a variable (Set) Once a variable is created, it can be assigned a numerical, text or logical value. Assign a numeric value Assign a text Assign a logical value 3. 6. 9 .4. - Increase the value of a variable (Change) This instruction allows you to increase the value of a variable. In the image the increment is 1 unit. It is equivalent to writing A = A + 1. Since it is much easier to understand this second form, it is the onl y one that we use in all of our books. 3. 6. 1 1 . - My blocks This group contains the programming blocks that allow creating and managing the blocks created by the user. It is the equivalent of the functions that we can find in other programming environments. The use of blocks (functions) allows to structure the programs better. A function is a set of instructions that perform a specific task, usually returning a result. They are, therefore, small programs within programs. They serve to avoid havi ng to repeat the same instructions throughout the program. When solving a problem, it is always better to divide it into smaller problems, which will be easier to solve. In programming, the same thing happens, so regardless of the programming environment o r language used, it is always better (if possible) to split the program into functions that perform simple and specific tasks. Another alternative is to create a loop for each task to be performed. These loops will all be executed in parallel when the pro gram is launched .
20. 20 1.3.3.3 . - Makeblock App The easiest way to use Codey Rocky is with the "Makeblock App" , available for both Android and Apple, which allows three modes. 1.3.3.3.1. - Drive In this mode the tablet or s martphone acts as a remote control from Codey. In addition to moving it in different directions and at different speeds, user can draw in its LEDS matrix or apply different combinations of sounds, expressions and movements . It is therefore a way for the younger to have fun with Codey.
83. 83 4 . - STEAM projects with mBlock5 This section deals with STEAM projects pro grammed with mBl o c k5. Section 3 details how to obtain the mBlock5 program and its operation. For all projects, it includes: Explanation, where appropriate, of the eleme nt to be reproduced. Approach of the project, proposed solution, time required and levels of difficulty (in relative terms with respect to the rest of the projects of the chapter) . Required components Pseudocode Program in mBlock5 Some of the projects can be used to carry out teaching activities for "Learning WITH Robotics". The reader can request to the author the collection of all the programs of the projects and activities in this section in mBlock5 format (see last page of the book). On this summaris ed edition we include some of the projects from the full book “Educational Robotics with Halocode” from the same author. To keep the same projects numbering, an empty section is included for the projects not included in this summary edition .
98. 98 4.1.8. - M etronome with light See the full book “Educational Robotics with Halocode” from the same author. 4.1.9. - S ound meter with light indicator A sound level meter is a measuring instrument used to measure the level of ambient noise, displaying the value in decibels on the screen. To carry out this project a sound sensor is required. In the market there are sensors that return the value of ambient sound and others that function as a sound switch , returning a 1 when the sound exceeds a threshold. Only the first ones serve to carry out this project. Objetive Complexity Make a light sound meter with Halocode. The number of LEDs lit will be proportional to the sound level. Time 20’ Program: medium
21. 21 1.3.3.3.2 . - Draw and Run In this mode the user draws a path on which sounds and colors can be included. Pressing "Play", Codey Rocky will follow the path by executing the instructions that he finds to emit sounds or turn on lights. It is a conceptual way to introduce the younger in the programming. 1.3.3.3.3. - Code This mode allows Codey Rock y programming using a block graphical environment very similar to mBlock5 . 1.3.3 . 4. - Programing Codey Rocky Codey has its own processor, so we can load programs into its memory so that it executes them autonomously. As usual in Arduino, the board can only contain a program that is executed when starting the robot. It can be programmed with the Makeblock App or with mBlock5.
25. 25 In 2003, matching up with the third generation of the iPod presentation , the New York Times include in an article the following sentence from Steve Jobs: Design is not just what it looks like and feels like. Design is how it works. 1.5 .2. - T each ing in Robotics "Teaching in robotics" focus es on learning of robotics itself: Specific robotics components Programming ( algorithm, program ) 1.5 .3. - Teaching with robo tic s " Teaching with robotics" focus es on any subject, whether technological or not, using robotics as an educational technological resource. In this case, robotics, instead the aim, it is the medium. In this book we will see projects made with Halocode that can then be used to carry out educational activities. An example of this would be the project "4.2.3. - Control the lit LEDS number " that allows to use Halocode as a didactic resource for le arning numbers in English.
52. 52 3.2 .2. - Bluetooth connection To connect the PC with Halocode via Bluetooth (BT4.0), the following steps mu st be followed: Con cect the Makeblock Bluetooth dongle to a PC USB port. Switch on Halocode . Press the button on the Bluetooth dongle . Once the pairing is achieved, the blue light of both components will remain fixed. In mBlock5 connect Halocode following the same process as described for USB port connection. 3. 3 . - Stage In the upper left mBlock5 environment, appears the stage window . In this book it is used only to visualize the values of the different variables, wh ich is very useful to check the operation of the program and debug possible errors, especially if we take into account that Halocode does not have a screen that allows us to show the values of the variables. T o display the va l u e from a variable in the stag e , simply check the box next to its name in the variable section. To be able to show the values of the variab les (in the sample image is “Dice”) ; you must work with the board in peripheral mode, that is, with the " upload mode" disabled . 3. 4 . - Execution options menu Below the stage window appears the execution options menu:
129. 129 In this project it is necessary to take care that the clamps connected to the power and ground pins do not make contact with any other element of the board. The structure described in section 2.9.2 helps reduce this risk . 4.3.2. - Adjustable intensity li ght (with potentiometer) Nowadays most ambient lights allow to regulate their intensity, so we are going to add this functionality to the project seen in section 4.1.1 through the use of a potentiometer. Objetive Complexity Carry out with Halocode a light that can be turned on and off, as well as adjust the intensity using a potentiometer. Time 30’ Program: medium
13. 13 1. - Introduction The purpose of this book is to provide theoretical and practical knowledge of robotics to readers, using Halocode as the working platform. It serves both for self - training and for educational support material. 1. 3 . - What is Makeblock ? Founded in 2012 , Makeblock is an Educational Robot i cs Manufacturer that offers STEAM products . The website of the company is www.makeblock.c om . 1.3.1. - Maker line Makeblock Maker line it’s composed of different robots with metallic structure, like mBot or Ranger . It consists of different mechanical parts and electronic modules, such as control boards, sensors, actuators, wheels, axes, beams, cables, etc. Its undoubted qualities have allowe d it to reach more than 140 countries in a very short time, making Makeblock one of the actually educational robotics l eading manufacturers.
37. 37 2. 5 . - Comunicat i on Halocode has several components for communication, both wired and wireless. 2. 5 .1. - USB connector Halocode has a mini USB connector that serves both to load the pro grams in your memory and to power it. 2. 5 .2 . - WiFi module The WiFi module allows Halocode to connect to a network to use , for example, the IoT funct ions or to communicate several bo ards with each other. 2. 5 .3 . - Bluetooth module The Bluetooth module is used to connect Halocode to a tablet, s martphone or PC. In the case of the PC it is advisable to use the Makeblock Bluetooth dongle . In section 3.2.2 we explain how to connect the Halocode board via Bluetoot h. 2. 6 . - Process or The processor is the brain of the robots. It is us ually located on the "control board" which, in addition to the processor, usually includes memory, input and output ports, USB connection to the computer, a reset button, the on / off switch and, optionally, some additional elements as sensors, actuators a nd Bluetooth connection.
59. 59 When Halocode is fully leveled in the horizontal plane, the acceleration values on the X and Y axes will be 0. When perfectly vertical, the acceleration value of the Z axis will be 0. 3. 6. 2 .9 . - Obtain the angle of lateral inclination ( roll ) This block allows to obtain the lateral rotation angle of Halocode. Returns values between 0 and 90 degrees, negative to the left and positive to the right. It is usually used to assign it to variables or condition actions. 3. 6. 2 . 10 . - Obtain the elevation angle ( pitch ) This block allows to obtain the inclination angle of Halocode. Returns values between 0 and 180, negative forward and positive backward. It is usually used to assign it to variables or condition actions. 3. 6. 2 .11. - Obtain the r otation angle with respect to the X axis This bloc k allows to obtain the rotation angle of the Halocode internal gyroscope with respect to the X axis, which corresponds to the angle of inclination of the board forward or backward. It is usually used to assign it to variables or condition actions.
84. 84 4.1. - W ith the H alocode board alone In this section several projects are carried out only with the Halo code bo ard, without additional components. 4.1.1. - Flashlight A Flashlight or torch is a portable hand - held electric light device that works with batteries, rechargeable batteries or even small dynamos. Objetiv e Complexity Carry out with Halocode a flashlight with a button to turn it on and off. Time 10’ Program : very low Components used
45. 45 Examples of wearable technology are smart watches, sneakers with built - in GPS, or wristbands that control our state of health, all of them increasingly present in our lives. In that sense we also make use of a proposal that we consider fits both the design and the concept of the Halocode, a wristwatch entirely made with LEGO pieces: 2. 9 .4 . - Metallic metric 3 screws To fix the Halocode board to the structure we propose to pass through the holes of the contact sensors metric 3 metal screws which, in addition, will serve to securely and secur ely grip the crocodile clips of the signal cables . 2.9.5. - Nylon metric 3 screws On the contrary, in the additional sensors it is advisable to use nylon screws to avoid false contacts. On the other hand, nylon fasteners are more suitable for fixing components to LEGO plastic parts without damaging them.
136. 136 4.3.4. - Environmental thermometer An environmental thermometer is a measurement instrument that allows to know the ambient temperature, either from a room or from outside. Objetive Complexity Carry out with Halocode an ambient analog thermometer. For this, a proportional analog temperature sensor TMP36 will be used. Time 20’ Program: medium Components used The analog temperature sensors do not directly return a value in degrees centigrade, so the gross value obtained must be processed. The TMP36 sensor, unlike thermosistors, does not use a resistance - sensitive resistor. Instead this sensor takes advantage of the property of the diodes to vary the voltage proportional to the temperature, so it is enough to read the output value and apply a rule of three.
147. 147 4.4.2. - Fire alarm The fire alarm is a device that detects the presence of flames, emitting a sound and visual warning. In some cases they can also activate the fire extinguishing system. Objetive Complexity Carry out with Halocode a fire alarm that is triggered when detecting the presence of flames. Once triggered by pressing the button it will reset. Time 10’ Program: medium
23. 23 https://www.makeblock.com/support 1.5 . - Focus of the book The content of this book is structured as follows: Explanation of Halocode sensors and actuators Explanation of the mBlock5 programming environment STEAM robotic projects using mBlock5 Many of the projects allow activities to promote "training in robotics", taking advantage of the possibilities of Halocode, along with its graphic al programming environment, to b ring the reader to robotics world and use the completed projects to achieve the following objectives: Access curricular contents from a different way. Overcome daily challenges putting into practice concepts and cognitive sk ills related to different curricular areas . Improve in the programming languages in a natural and playful way. Develop learning by research. Learning by trial and error. Consider the educational robotics as another learning resource. Enlist interest in the world of robotics and home automation.
51. 51 3.2 .1. - USB connection Halocode can be connected to a PC through the mini USB connector on top. After connecting the USB cable, click on mBlock5 in "Connect", opening a window to select the port. Just select the COM port to which the Halocode board has been connected and click on "Connection". As indicated, there can not be more than one device connected simultaneously, so when a new device is connected, the one that was previously connected is disconnected. Once the connection is successful, this window closes and in the Devices section the option to load the program appears (upload). The USB connection itself provides power to Halocode.
58. 58 3. 6. 2 .5. - Check the position of Halocode This block is used to check the position of Halocode. It is usually used to condition actions. The possible positions that can be checked are: Left - tilted (Roll left) Right - tilted (Roll right) Arrow up (Tilted up) Arrow down (Tilted down) F ace up ( LEDS rind up) Face down ( LEDS ring down) 3. 6. 2 .6. - Check if Halocode is shaken This block is used to know if the Halocode gyro sensor detects that it is being shaken. It is usually used to condition actions. 3. 6. 2 .7. - Get the value of the s haking strength This block allows you to obtain the value with which Halocode is shaking . It is usually used to assign it to variables or condition actions. 3. 6. 2 .8. - Obtain the acceleration from an axis (X, Y, Z) This block allows obtaining the acceleration with respect to one of the axes, X, Y or Z, in m / sec2. This value allows, for example, determining precisely the degree of inclination of Halocode with respect to any of the axes.
121. 121 4.2.3. - Control the lit LEDS number Today there are many devices that you can control with your voice. Have you ever wondered how they do it? In this project you will see how easy it is! Objetive Complexity Control with the voice the lit LEDS number . Time 30’ Program: high After pressing and releasing the button, the name of the desired number is indicated. It must be pronounced correctly in English because, otherwise, the program wil l not be able to understand it and will turn on all LEDS in red. Components used
142. 142 Components used Proposed pseudocode Forever PIR = Read digital value pin 3 If PIR = 1 Turn on all LEDS in red Else Turn off all LEDS Program developed with mBlock5
17. 17 1.3.2.1. - Neuron blocks Each Neuron component is assembled by a compact design closed block that provides security and durability. 1.3.2.2. - Pogo connectors The connections between the Neuron components are made throug h Pogo connectors, a c onnector type designed specifically by the company Everett Charles Technologies (ECT) to establish temporary but safe connections between electronic components . 1.3.2.3 . - Neuron Kits Neuron is available in kits (Inventor, Explorer, Artist and Creative), although you can also buy single components. The updated prices of the available components can be found on the Makeblock website:
117. 117 4.2.2. - Halocode shows the indicated color One of the most typical functionalities of domestic virtual assistants is to be able to turn on and off lights with the voice. In some cases they also allow to c hoose the light color . Objetive Complexity Control the Halocode LEDS c olour with the voice. Time 20’ Program: high After pressing and releasing the button, the name of the desired c olour is indicated. It must be pronounced correctly in English because, otherwise, the program will not be able to understand it. Indicating "Off" the LEDS will turn off. Components used
16. 16 1.3 . 1. 5. - Easy connections All of the Mak er line products connections are "plug and play" by means of RJ25 connectors, similar to those of LEGO, and with c olour codes, so that it is not necessary to solder cables or use prototyping boards, which allows focused on robotics. 1.3.1.6. - Arduino compatible Makeblock ME sensors and actuator s are Arduino open source compatibles. 1.3.1. 7 . - Other books by the same author For “maker” line we offer these Spanish books by the same author: Educational Robotics with mBo t and Arduino (ISBN 978 - 8469749326) Educational Robotics with Ranger and Arduino (ISBN 978 - 8469771709) Domotics easy with Makeblock (ISBN 978 - 8409023752) 1.3.2. - Neuron Neuron is an educational robotics plat form based on interconnectable blocks, with more than 30 different functionalities , that allows to carry out in a very easy way all kinds of STEAM projects . Precisely that simplicity makes it very suitable to introducing youngsters in electronics and robotics, but its power and versatility allows it to be used for all ag es and levels.
31. 3 1 2. 2 .1 . - Potentiometer A potentiometer is a variable resistor. That is, an electronic component that makes it possible to regulate the intensity of the current (the amount of electricity) circulating in a circuit. A clear example are the controls that allow adjusting the volume in the music equipment. It is a very useful robotic sensor since it serves to select values, regulate s peeds, light intensities , etc. In the following diagram we show how to connect it to the Halocode board: Signal wire ( yellow ) : pin 3 ( could also connect on pin 2 ) Power wire ( r ed ) : pin 3.3 Volt s Ground wire ( black ): Ground pin (GND) 2. 2 .2 . - Light sensor The light sensor allows Halocode to measure the intensity of light, which gives it a certain capacity for monochrome vision, not to see images as a whole, but rather the level of ambient light. This functionality opens the door to the development of projects such as photometers, twilight switches, etc.
18. 18 https://store.makebl ock.com/index.php?route=product/search&search= neuron 1.3.2.4. - Other books by the same author For more information the reader has the Spanish book “ Educational Robotics with NEURON” by the same author (ISBN 978 - 8409046966) . 1.3.3. - Codey Rocky Codey Rocky is a programmable robot specifically designed to introduce in the educational robotics and STEAM projects to children from six years of age. For this, it combines a simple and attractive robotic hardware with two very simple and intuitive graph ic al programming environments, one for tablets and smartphones and the other one , more powerful, for computers. As its name suggests, it is composed from two elements. On e is Codey and other on e is Rocky. C h aracter i stics of Codey Rocky Dimension s 102 x 95.4 x 103 mm (Codey and Rocky assembled ) Weight 290 . 5 gram s (Codey and Rocky assembled )
32. 32 It is an analog digital component, so it must be connected in one of the analog digital pins (2 or 3) in a similar way as described in section 2.2.1. 2. 2 .3 . - Temperature sensor The temperature is a magnitude referred to the common notions of hot, warm or cold that people can perceive through ther mo receptors, located in the skin, of cold and heat, called Krause corpuscles and Ruffini corpuscles respectively . We can determine the numerical value of this magnitude by means of the analog temperature sensor TMP36 of Elecfreaks, capable of measuring temperatures in a range between - 55 and 125 degrees centigrade with an accuracy of +/ - 0.5. It is an analog digital component, so it must be connected in one of the analog digital pins (2 or 3) in a similar way as described in section 2.2.1. 2. 2 .4 . - Soil moisture sensor This sensor determines the soil moisture by measuring the conductivity between the two probes and returning an analog value between 0 and 1023. Since water is a good conductor of electricity, the higher the humidity, the greater the measured current . With this type of sensor you can, for example, control the humidity of a plant or, even, proceed to its irrigation when necessary. The mBlock5 programming environment does not have a specific block to manage it, so we will use the direct reading block of the pin to which it is connected. It is an analog digital component, so it must be connected in one of the analog digital pins (2 or 3) in a similar way as described in section 2.2.1
55. 55 3. 6. 1. 4 . - Turn on all LEDs with a certain colo u r This block al lows you to turn on all the LEDS by specifying a certain color, saturation and brightness. Clicking on the c olour opens a drop - down that allows selecting each parameter. It also has a tool in the lo wer part to take the c olour sample from the mBlock5 stage . 3. 6. 1. 5 . - Turn on all LEDs (brightness parameter) This block allows you to turn on all the LEDs by specifying a certain color, saturation and brightness, but you can also set the brightness, either with a constant value or with a variable. 3. 6. 1. 6 . - Turn off all LEDS This block allows you to turn off all RGB LEDS. 3. 6. 1. 7 . - Turn on all LEDs by specifying RGB values This block allows you to turn on all the LEDs by specifying the value of each of the three component colors (red, green or blue). Indicating the values 0 the LEDS turn off. Instead of the values, variables can be used .
112. 112 4.1.15. - Quiniela (Football Lottery) See the full book “Educational Robotics with Halocode” from the same author. 4.1.16. - Rock - paper - scissors See the full book “Educational Robotics with Halocode” from the same author. 4.1.17. - Chronometer See the full book “Educational Robotics with Halocode” from the same author. 4.1.18. - Timer See the full book “Educational Robotics with Halocode” from the same author. 4.1.19. - Wristwatch See the full book “Educational Robotics with Halocode” from the same author. 4.1.20. - Pe d ometer A pedometer is a device, usually portabl e and electronic or electromechanical, that counts each step a person takes by detecting the motion of the person's hands or hips. Its operation is based on an accelerometer . Today many devices (smartphones, digital watches, etc.) incorporate the pedometer function.
78. 78 3. 6. 9 . - Variables This group contains the programming blocks that allow creating and managing variables. A variable is a container to which we give a name to identify it and in which we can store a data. There are different types of containers to store different types of data: Integer numbers D ecimal numbers Text Logical vaules ( true o r false ) In the mBlock5 environment, the types of variables are not differentiated, so a variable can contain any type of data, be it numeric, literal or logical. The group "Variables" has the option " Make a variable", which is used to create a new variable. In the stage area appear the vari ables created, as well as their value, which is very useful to check and debug programs. 3. 6. 9 .1. - Make a variable This option is used to create variables. Once created, they can be assigned a numerical, literal or logical value. Variable n ames can contain any character except these: (& <> ") Here you can select if the variable is only for the current project or for all the projects. 3. 6. 9 .2. - Show a variable on the stage For a variable to be displayed in the s tage , simply check the box next to its name in the variable section.
127. 127 4.2.4. - Control the LEDS from a remote Halocode See the full book “Educational Robotics with Halocode” from the same author. 4.2.5. - Send messages to mBlock5 stage See the full book “Educational Robotics with Halocode” from the same author. 4.3 . - With Halocode board and one more component In this section several projects are proposed in which an additional component is added to Halocode. 4. 3.1. - Doorbell An electric bell is a device that produces an audible signal when button is pressed. It has many applications, being one of the most c ommon, the doorbell . Objetive Complexity Carry out with Halocode a simple bell that emits a mono tonal acoustic signal and light up while the button is pressed. Time 10’ Program: low
152. 152 4.4.3. - Motion and noise alarm See the full book “Educational Robotics with Halocode” from the same author. 4.4.4. - Twilight courtesy light A twilight courtesy light is a light that is located in areas of passage and turns on automatically when detected by a PIR sensor the presence of a person, turning off after a while. Some are equipped with a light sensor so that it only lights at night, reducing energy consumption during the day. Objetive Complexity Carry out a twilight courtesy light that, when it is at night, automatically turns on when detecting the passage of a person. Failing to detect a person, it will turn off after a delay time set in the program. Time 30’ Program: high Components used
102. 102 SoundLevel = Microphone volume If SoundLevel less than OrangeLevel Turn on all LEDS in green Else If SoundLevel greater than RedLevel Turn on all LEDS in red Else Turn on all LEDS in orange Program developed with mBlock5
134. 134 Function F DayNight AmbientLight = analog value pin 3 ( light sensor ) If AmbientLight less than 200 Night = 1 Else Night = 0 Program developed with mBlock5
76. 76 3. 6. 8 . 5 . - Contrary (No t ) This block allows you to invert the resulting value of a condition. It corresponds to the "No t " operation of the Boolean algebra. No t (1) = 0 No t (0) = 1 3. 6. 8 . 6 . - Jo i n texts This block concatenates texts. In the example, the result would be "Hello world!" 3. 6. 8 . 7 . - Extract a character from a text (Letter) This block extracts a character from a text. In the example, the result would be "u". 3. 6. 8. 8 . - Length of a text This block returns the length of a text. In the example, the result would be 4. 3. 6. 8 . 9 . - Check if a text contains a string This block allows you to check if a text contains a string of characters. In the example, the result is 1 (True). This block will be used together with the result of speech recogn ition to condition instructions:
34. 34 2.3 . - Actuator s integrated in Halocode An actuator is a device capable of transforming hydraulic, pneumatic or electric energy in the activation of a process with the purpose of generating an effect on an automated process . The actuator receives the order of a regulator or controller and accordingly generates the order to activate a final control element, such as a valve. 2. 3 . 1 . - RGB LED Halocode has integrated 12 RGB LEDS form ing a ring. Each RGB LED is made up of three monochrome LEDS , one of each primary color: red, green and blue. The a cronym RGB stands for red, green and blue colors . By combining these three primary colors you can get any colour from the spectrum. In mBlock5 LED RGB it is controlled with several specific blocks that allow to indicate a c olour name or the value of each component c olour (red, green and blue). 2.4. - Additional actuators As we saw in section 2.1.5, the Halocode board has pins in which additional sensors and actuators can be connected. The additional actuators that we will use in this book will be, like the sensors, compatible with Ardui no and prototyping board free . 2. 4 .1 . - Buzzer A buzzer is a passive electro acoustic transducer (there are also active transducers) that produces a mono tonal continuous sound (usually sharp). It serves as a signaling or warning mechanism and is used in multiple systems, such as household appliances, vehicles, etc.
137. 137 On the o ther hand we will use a very specific block of mBlock5 that allows to directly display a value, within the scale 0 to 100, with a c olour graduation. Up to 60, it shows the LEDS in green, above 60 and up to 80, it shows them in orange and, above 80, it show s them in red. In general we do not recommend making use of such specific blocks since the reader will not find them in other environments. For this reason for this project we show a second more elaborate solution that, although it has the same functionality, is carried out with usual instructions in any environment. Proposed pseudocode ( mBlock5 specific solution ) Forever RAW = read analog value from pin 3 ( temperature sensor ) TempC = RAW * 19 / 236 LEDS = TempC * 100 / 40 Show in LEDS ring the value LEDS Program developed with mBlock5
103. 103 4.1.11. - Rhythm meter See the full book “Educational Robotics with Halocode” from the same author. 4.1.12. - Disco L ight The disco lights show different patterns of lights and colors that follow the rhythm of the music through a microphone that measures both the volume and the frequency of the sound. The simplest ones work with LED lights and have a series of selectable patterns, while the most sophisticated ones work with laser light and allow to create and personalize the patterns. Objetive Complexity Carry out a disco light with Halocode, making the lights turn and change c olour to the rhythm of the music. With the contact sensors 0 and 1, the sensitivity of the microphone can be adjusted. Time 15’ Program: high
109. 109 4.1.13. - Heads or tails See the full book “Educational Robotics with Halocode” from the same author. 4.1.14. - Dice A die is a cube, with each of its six faces showing a different number of dots from one to six. Dice are suitable as gambling devices for games like craps and are also used in non - gambling tabletop games. The electronic variant can have a similar shape or represent the value by means of a set of LEDS on a single face. Objetive Complexity Carry out an electronic die with Halocode. To “throwing” the dice just press and r elease the button, after which Halocode will show random number, between 1 and 6 , until it stops. Time 20’ Program: medium
12. 12 4.1.21. - Drop ................................ ................................ .......................... 116 4.1.22. - Bubble level ................................ ................................ .............. 116 4.2. - Halocode and speech recognition ................................ ..................... 116 4.2.1. - Turn LEDS on and off with voice ................................ ................. 116 4.2.2. - Halocode shows the indicated color ................................ ........... 117 4.2.3. - Control the lit LEDS number ................................ ....................... 121 4.2.4. - Control the LEDS from a remote Halocode ................................ 127 4.2.5. - Se nd messages to mBlock5 stage ................................ ............... 127 4.3. - With Halocode board and one more component ............................. 127 4.3.1. - Doorbell ................................ ................................ ...................... 127 4.3.2. - Adjustable i ntensity light (with potentiometer) ......................... 129 4.3.3. - Twilight light ................................ ................................ ............... 133 4.3.4. - Environmental thermometer ................................ ...................... 136 4.3.5. - Alarm of presence ................................ ................................ ....... 141 4.3.6. - Multi colour light with remote control ................................ ....... 144 4.4. - With Halocode and two more components ................................ ...... 144 4.4.1. - Sound presence alarm ................................ ................................ 144 4.4.2. - Fire alarm ................................ ................................ .................... 147 4.4.3. - Motion and noise alarm ................................ ............................. 152 4.4.4. - Twilight courtesy light ................................ ................................ 152 4.4.5. - Automatic watering ................................ ................................ .... 157 4.4.6. - Alarm of presence with remote control ................................ ..... 157 4.5. - Real home automation with Halocode ................................ ............. 157 5. - Further material ................................ ................................ .... 158
141. 141 4.3.5. - Alarm of presence A presence alarm is a device that emits a warning, usually sound, when detecting the presence of a person. N ormally i t is located on the doors of shops and offices. Conceptually it is an element very similar to the alarm based on a presence sensor, but it incorporates a loudspeaker to emit a warning sound, as well as an LED in case you want it to work in silent mode. Objetive Complexity Using the PIR senso r carry out a visual presence alarm . Time 10’ Program : low
15. 15 1.3 .1. 1. - Open source A s the manufacturer states , Makeblock will be Open Source Hardware for ever with CC - B Y - SA3.0 licence , so that the diagrams, plans and firmware will always be public. 1.3 . 1. 2. - Simple and flexible assemblies Connecting parts together is really simple and fast : its threaded beams allow to screw any other part along from the beam without need from using nuts . 1.3 . 1. 3 . - Programmable with Scratch, mBlock 5 and Bitbloq The Makeblock electronics are compatible with Scratch, a widespread graphic environment with which you can learn to program easily. mBlock5 is the Scratch 3 version developed by Makeblock for this product line. Since May 2017 some Makeblock products can also be programmed with Bitb loq, an environment that, in our opinion, is much more powerful, but also somewhat more complex. 1.3 . 1. 4. - Lego compatible Due t he holes distance in the structural parts of Makeblock and LEGO is the same, structural and robotic elements can be combined with both platforms, that we think fit s perfectly with the robotics concept . In fact, in our books focused on the Maker line (mBot and Ranger) we take advantage of this feature to carry out some of the projects.
29. 29 On the contrary for analog inputs (values between 0 and 1023) only pins 2 and 3 can be used. 2.1.5.2. - Power pin The pin labeled "3.3 V" provides power to the additional sensors or actuators connect ed to the Halocode board. If crocodile clips are u sed, it must be avoided that the s e make s contact with other components or pins of the board , since this could be damaged. 2.1.5.3. - Ground pin The pin labeled "GND" is the ground connector for the additional sensors or actuators that we connect ed to the Halocode board. If crocodile clips are u sed, it must be avoided that the s e makes contact with other components or pins of the board , since this could be damaged. 2.2. - Additional sensors The Halocode board has connector pins for additional Arduino sensor s and actuators . You can connect to Halocode without the need for protoboards or resistors, which makes mo unts much easier and allows to focus in robotics. The connection of the free protoboard components to t he Halocode board is very easy. Simply slightly modify the supplied wire , chang ing the connector s from the board side by three crocodile clips, for which welding is not required.
144. 144 4.3.6. - Multi c olour light with remote control See the full book “Educational Robotics with Halocode” from the same author. 4.4. - With Halocode and two more components In this section several projects are proposed in which two additional components are added to Halocode board . 4.4.1. - Sound presence alarm A presence alarm is a device that emits a warning, usually sound, when detecting the presence of a person. N ormally i t is located on the doors of shops and offices. Conceptually it is an element very similar to the alarm based on a presence sensor, but it incorporates a loudspeaker to emit a warning sound, as well as an LED in case you want it to work in silent mode. Objetive Complexity Using the PIR sensor carry out a vis ual and audible presence alarm . Time 10’ Program: low
28. 28 2.1.5. - Connection pins Halocode board has 6 connection pins identifiable by its golden color: WIDE PIN S GND Ground . Never connect directly to the power pin . 3 V Input or output 3 volt power. If the board is powered either through the USB connection or the battery, this pin works as output power. Otherwise, it can be used for power input . Nev er connect directly to the “GND” pin . 0, 1, 2 and 3 Input or output signal, both analog and digital. 2.1.5 .1. - Input and output pins The four large pins allow the connection of components through cables equipped with crocodile clips. Although crocodile clips hold the cable tightly, they can easily rotate, making contact with adjacen t pins, which could damage the bo ard. The structure proposed in section 2.9.2 reduces the risk of causing a short circuit by clamping the clamp on a metal screw fixed to each pin . The 4 pins can be used for digital (ie : binary) inputs and outputs and for analog outputs (ie : values between 0 and 1023).
128. 128 Components used Proposed pseudocode Forever If button pressed Turn on all LEDS RGB in green Repeat 500 times Write in pin 3 ( buzzer ) the value 1023 Write in pin 3 ( buzzer ) the value 0 Turn off all LEDS Program developed with mBlock5
101. 101 4.1.10. - Noise classroom traffic light A noise classroom traffic light is a effective way to control the acceptable noise level in the classroom , that will depend on the activity to be developed. Once this level is set, when the noise in the classroom exceeds it, the traffic light will warn students to lower their voice. Objetive Complexity Carry out with Halocode a classroom noise traffic light . Time 15’ Program: medium Components used Proposed pseudocode Orange Level = 50 Red Level = 70 Forever
26. 26 2. - Haloc ode components In the same way that the brain of living beings receives information through the senses and coordinates and moves the limbs, robots can interact in different ways with the environment, depending on the sensors and actuators used. 2.1. - Integrated sensors in Halocode Sensors are the elements that give the robot "senses", such as touch, sight, hearing, balance, etc. In the following sections we will see the sensors that will be used in this book, starting with those that incorporate the Halocode board. 2.1.1 . - Button Halocode has a single blue button, lo cated in the center of the board . A button is a sensor which returns a logical value based on its state: True ( logical 1 ) if pressed False ( logical 0 ) if not pressed When the button is used to select options or toggle states (such as turning an LED on or off) it is convenient to include a waiting time of about 0.3 seconds since, being the p rocessor much faster than user , as long as the user believes tha t performs a single press, the processor may have checked the status of the button tens or hundreds of times. Another, more efficient option is to wait for the button to be released. 2.1.2. - Touch sensor The four golden colored connection Halocode pins are also touch sensors. Conceptually this type of sensor, also known as a capacitive sensor, is very similar to a push button but, unlike this one, it does not need to be pressed, since it is enough to touch it to activate it .
89. 89 4.1.3. - Flashlight with brightness, c olour and blink adjustment See the full book “Educational Robotics with Halocode” from the same author. 4.1.4. - Emergency vehicle lighting Emergenc y vehicles, such as ambulances, fire engines, patrol cars , snowplows or cranes ar e equipped with intense blinking lights that warn of their presence. The colour of the light identifies the type of vehicle. In most countries, police, fire and medical services carry, respectively, blue, red and yellow lights. Objetive Complexity Carry out an emergency light with Halocode with the following functionalities: Long press = Turn on or off Short press = Change color Time 20’ Program: medium
27. 27 2.1. 3 . - Sound and voice sensor Halocode integrates a sound sensor and voice sensor . This sensor gives Halocode a sense similar to the sense of hearing capable, not only of measuring the intensity of sound, but also of interpreting it, which allows interesting applications, such as for example that the user can turn on or off the LEDS with the voice . By means of this type of sensor it is possible to carry out a multitude of devices such as a sound level meter (instrument that measures the ambient sound), sonic alarms or a fun light noise for the classroom. 2.1.4 . - Gyroscopic and accelerometer sensor Halocode has a gyroscopic sensor and accelerometer, which allow to measure the angular movement and acceleration in the 3 axes. Th e gyroscope range is + - 180° on the X axis and + - 90 ° o n the Y axis, while the accelerometer range is + - 8g. With this component we can detect board r o tation and accelerations as well as its position in its 3 axes.
22. 22 1.3.3.5. - Othe r books by the same author For more information the reader has the Spanish book “ Educational Robotics with Codey Roc ky” by the same author (ISBN 978 - 8409067527) . 1.3.4. - Haloc ode HaloCode is a programmable small board that integrates some components : Button 4 Contact sensors Microphone 12 RGB LEDS WiFi module In section 2 the Halocode is full detailed. Halocode can be programmed from a computer (PC or Mac) with mBlock5, a graphical programming environment based on Scratch 3. In section 3 of this book mBlock5 environment is detailed explained . 1. 4 . - On line suppport Makeblock offers a website where users can find all kinds of resources and didactic material for their products:
10. 10 2.4.3. - Fluid pump ................................ ................................ .................... 36 2.5. - Comunication ................................ ................................ ...................... 37 2.5.1. - USB connector ................................ ................................ .............. 37 2.5.2. - WiFi module ................................ ................................ .................. 37 2.5.3. - Bluetooth module ................................ ................................ ......... 37 2.6. - Processor ................................ ................................ ............................. 37 2.6.1. - Firmware updat e ................................ ................................ .......... 38 2.7. - Program ................................ ................................ ............................... 38 2.7.1. - Algorithm ................................ ................................ ...................... 39 2.7.2. - Pseudocode ................................ ................................ .................. 39 2.7.3. - Programming ................................ ................................ ................ 40 2.7.4. - Programming by functions ................................ ........................... 40 2.8. - Power supply ................................ ................................ ....................... 41 2.9. - Structural parts ................................ ................................ ................... 42 2.9.1. - Modding Pc ................................ ................................ ................... 42 2.9.2. - LEGO Technic parts ................................ ................................ ....... 42 2.9.3. - Wareable technology ................................ ................................ .... 44 2.9.4. - Metallic metric 3 screws ................................ ............................... 45 2.9.5. - Nylon metric 3 screws ................................ ................................ .. 45 3. - Programming with mBlock5 ................................ ..................... 46 3.1. - Initial screen of mBlock5 ................................ ................................ ..... 46 3.2. - Board selection and connection ................................ ......................... 49 3.2.1. - USB connection ................................ ................................ ............. 51 3.2.2. - Bluetoot h connection ................................ ................................ ... 52 3.3. - Stage ................................ ................................ ................................ ... 52 3.4. - Execution options menu ................................ ................................ ..... 52 3.5. - MBlock5 program edition options menu ................................ ............ 53 3.6. - Programming block menu ................................ ................................ ... 53 3.6.1. - Lighting ................................ ................................ ......................... 53 3.6.2. - Sensing ................................ ................................ .......................... 57 3.6.3. - Pins ................................ ................................ ............................... 61
11. 11 3.6.4. - Wi - Fi ................................ ................................ .............................. 63 3.6.5. - LAN ................................ ................................ ............................... 66 3.6.6. - Events ................................ ................................ ........................... 68 3.6.7. - Control ................................ ................................ .......................... 70 3.6.8. - Operators ................................ ................................ ...................... 73 3.6.9. - Variables ................................ ................................ ....................... 78 3.6.11. - My blocks ................................ ................................ .................... 79 3.2.12. - Extensions ................................ ................................ ................... 81 3.7. - mBlock5 to Python translation ................................ ............................ 82 4. - STEAM projects with mBlock5 ................................ ................. 83 4.1. - With the Halocode board alone ................................ .......................... 84 4. 1.1. - Flashlight ................................ ................................ ....................... 84 4.1.2. - Flashlight with brightness adjustment ................................ ......... 85 4.1.3. - Flashlight with brightness, colour and blink adjustment .............. 89 4.1.4. - Emerge ncy vehicle lighting ................................ ........................... 89 4.1.5. - Rotating Emergency vehicle lighting ................................ ............ 93 4.1.6. - SOS signal light ................................ ................................ .............. 94 4.1.7. - Kids night light ................................ ................................ .............. 97 4.1.8. - Metronome with light ................................ ................................ .. 98 4.1.9. - Sound meter with light indicator ................................ .................. 98 4.1.10. - Noise classroom traffic light ................................ ..................... 101 4.1.11. - Rhythm meter ................................ ................................ ........... 103 4.1.12. - Disco L ight ................................ ................................ ................. 103 4.1.13. - Heads or tails ................................ ................................ ............ 109 4.1.14. - Dice ................................ ................................ ........................... 109 4.1.15. - Quiniela (Football Lottery) ................................ ........................ 112 4.1.16. - Rock - paper - scissors ................................ ................................ .. 112 4.1.17. - Chronometer ................................ ................................ ............ 112 4.1.18. - Timer ................................ ................................ ......................... 112 4.1.19. - Wristwatch ................................ ................................ ............... 112 4.1.20. - Pedometer ................................ ................................ ................ 112
9. 9 Table o f Contents 1. - Introduction ................................ ................................ ............ 13 1.3. - What is Makeblock? ................................ ................................ ............ 13 1.3.1. - Maker line ................................ ................................ ..................... 13 1.3.2. - Neuron ................................ ................................ .......................... 16 1.3.3. - Codey Rocky ................................ ................................ .................. 18 1.3.4. - Halocode ................................ ................................ ....................... 22 1.4. - On line suppport ................................ ................................ ................. 22 1.5. - Focus of the book ................................ ................................ ................ 23 1.5.1. - STEAM Philosophy ................................ ................................ ........ 24 1.5.2. - Teaching in Robotics ................................ ................................ ..... 25 1.5.3. - Teaching with robotics ................................ ................................ . 25 2. - Halocode components ................................ ............................. 26 2.1. - Integrat ed sensors in Halocode ................................ .......................... 26 2.1.1. - Button ................................ ................................ ........................... 26 2.1.2. - Touch sensor ................................ ................................ ................. 26 2.1.3. - Sound and voice sensor ................................ ................................ 27 2.1.4. - Gyroscopic and accelerometer sensor ................................ ......... 27 2.1.5. - Connection pins ................................ ................................ ............ 28 2.2. - Additional sensors ................................ ................................ ............... 29 2.2.1. - Potentiometer ................................ ................................ .............. 31 2.2.2. - Light sensor ................................ ................................ ................... 31 2.2.3. - Temperature sensor ................................ ................................ ..... 32 2.2.4. - Soil moisture sensor ................................ ................................ ..... 32 2.2.5. - PIR sensor ................................ ................................ ..................... 33 2.2.6. - Flame sensor ................................ ................................ ................. 33 2.3. - Actuators integrated in Halocode ................................ ....................... 34 2.3.1. - RGB LED ................................ ................................ ........................ 34 2.4. - Additional actuators ................................ ................................ ............ 34 2.4.1. - Buzzer ................................ ................................ ........................... 34 2.4.2. - Relay ................................ ................................ ............................. 35
85. 85 Proposed pseudocode Forever Wait until button pressed Turn on all RGB LEDS in white color Wait until button released Wait for pressed button Turn off all RGB LEDS Wait until button released Program developed with mBlock5 4.1.2. - Flashlight with brightness adjustment Starting from the previous project, we will add the possibility of adjusting the brightness. Objetive Complexity Carry out a flashlight with a button to turn it on and off with Halocode. Starting fro m the previous project, add the possibility of adjusting the brightness using touch sensor 0 and 1. Time 20’ Program : l ow
91. 91 Execute function FColourChange Function FColourChange Colour = Colour + 1 If Colour greater than 5, then Colour = 1 Execute function FLEDSOn Function F LEDSOn If Color=1 turn on all LEDS in red If Color=2 turn on all LEDS in yellow If Color=3 turn on all LEDS in green If Color=4 turn on all LEDS in blue If Color=5 turn on all LEDS in magenta Function F LED Off Turn off all LEDS Program developed with mBlock5
47. 47 Op tion Description Option menu : My P ro j ect s Shows the user's projects . From this screen you can manage existing projects (open, share, rename, copy, save to the computer, delete) or open it. New Proj ect Start a new project Open from your computer Open a project from the local computer. Example programs ( See same section of ) Help Help User manual Check for updates Send comments to Makeblock About mBlock 5 Exit Exit mBlock5 Language Language selection Update translation
48. 48 My P ro j ects Shows the user's projects. From this screen you can manage existing projects (open, share, rename, copy, save to the computer, delete) or open it. Start a new project Search projects Open recently worked projects. Sample programs Codey Rocky Codey Rocky projects samples Stage Stage samples AI AI Samples IoT IoT samples Project name To change Project name Save Save Save in the same place and with the same name Save as Save with other name Save to computer Save to computer with other name Identify Log in mBlock5 community. Once identified, the projects are saved in the cloud. You can also use the IoT functionalities and see data in the cloud . Selecting a specific language translates the entire environment, including the programming blocks. Sometimes, especially for those who have experience programming, it is better to use the English language, since in this way the functionality of each programming block is better identified. When you open an existing project or start a new one, you access the graphic al programming environment, made up of different areas that we have marked with different colors.
53. 53 Execution options menu Expand the stage Stops program execution S tart program execution (in peripheral mode that is, with "up mode" disconnected ) 3. 5 . - MBlock5 program edition options men u This menu includes the edition options. E dition menu Undo the last action Recover the undo It allows selecting the programming language available for t he platform: by blocks, Python, ... Zoom (" - " to reduce, "+" to increase ) 3. 6 . - Programming block menu In the programming environment, each resource is a block. These blocks are grouped by type of functionality. Lighting Sensing Variables Pins Wi - Fi LAN Event s My Blocks Control Opera tors + Extension center 3. 6. 1. - Lighting This group includes the bl ocks used to manage the RGB LEDS ring that Halocode has on its front. 3. 6. 1.1. - Play LED animation with different effects This block shows a certain pattern of lights in the RGB LEDS ring.
74. 74 3. 6. 8 .1. - Arithmetic operations These four blocks allow performing arithmetic operations (addition, subtraction, multiplication and division) between variables and constants. A ddition S ubtraction Multiplicatio n Divisio n Blocks can be combined: E quivalent to Average = (A + B) / 2 3. 6. 8 .2. - Random number A rand om number is a number chosen random ly . They are used mostly in games to make it look like an unpredictable operation of the program. In the case of robots, it allows to give him apparently random behavior. The random numbers generated b y the computer can not really be considered random since they follow a sequence determined from an initial number called “random seed ” . 3. 6. 8 .3 . - Compariso n These three blocks allow you to compare two variables of the same type. If the comparison is true, the result is true. Otherwise it is false. Assuming that the variables to be compared are A and B, the possible comparisons are: Logical Operation What does Equivalent to A = B Check if A value equals the B value A is equal to B? A > B Check if A vaule is greater than B value A is greater than B? A < B Check if A vaule is lower than B value A is lower than B? This block can be combined, for example, with the "No" block, which allows to increase the variants:
99. 99 Components used Proposed pseudocode Forever Sound Level = Microphone volume Execute function FLEDS Function F LEDS LED = Round ( 12 * Level / 100) Execute function FLEDSOn Execute function FLEDSOff Function F LEDSOn I = 1 Repeat until I > LED Turn on LED = I in white I = I + 1 Function F LEDSOff I = 12 Repeat while I less than LED Turn off LED = I I = I - 1 Program developed with mBlock5
110. 110 Components used Proposed pseudocode Brightness = 50 Forever If button pressed Repeat until button is not pressed Execute function F DiceRoll Ro ll = random value between 3 and 8 Repeat times = Ro ll Execute function F DiceRoll Function F DiceRoll Turn off all LEDS Dice = Random value between 1 and 6 LED = 1 Repeat until LED greater than Dice Turn on LED = LED in white LED = LED + 1 Wait 0.2 seconds
75. 75 Logical Op. What does Equivalent to No t ( A = B ) Check if it is not true that the value of A is equal to the value of B A no t equal to B? Normally the comparison block is usually used in combination with control blocks: 3.6. 8 . 4 . - Logical operators AND, OR With these two blocks you can perform logical operations AND and OR . In logical operations, 1 equals "true", while 0 equals "false". The operator AND allows combining two conditions. For the overall result to be true, both conditions must also be true. The operator O R allows combining two condi tions but, unlike the operator AND , it is enough that one of them is true so that the global is true. Logical operation AND Result Logical operation OR Result 1 AND 1 = 1 1 1 OR 1 = 1 1 1 AND 0 = 0 0 1 OR 0 = 1 1 0 AND 1 = 0 0 0 OR 1 = 1 1 0 AND 0 = 0 0 0 OR 0 = 0 0
90. 90 Components used In this project we will see how to use the same component, in this case the button, to control two parameters, the status (on or off) and the color, depending on the time that is kept pressed. To control the on and off state, the normal thing in robotics is to use a logical variable, for example "OnOff", which contains 1 for the on state and 0 for the off state. To change the states, simply execute the operation "OnOff = opposite that ( OnOff )" ev ery time the button is pressed. Although in mBlock5 it is possible to use logical variables, another option is to use a numeric variable whose values will be 1 for on and - 1 for off. To change the states, simply multiply the variable by - 1 each time the button is pressed. Proposed pseudocode Execute function FInit Forever Execute function FButton Execute function FOn Function F Init Brightness = 100, On = - 1, Colour = 1, Time = 0.1 Function F O n If On = 1 Execute function FLEDSOn Wait seconds = Time Execute function FLEDOff Wait seconds = Time Function FButton If button pressed TimeButton = Execution time Wait for the button not pressed TimeButton = Execution time – TimeButton If TimeButton greater than 1 On = On * ( - 1) Else
145. 145 Components used Proposed pseudocode Forever PIR = Read digital value pin 3 If PIR = 1 Turn on all LEDS in red Execute function FBeep Else Turn off all LEDS - - - - - - - - - - - - - - - - - - - - - - - - - - - - - - - - - Function F Beep Repeat 50 times Write 1 in digital pin 0 Write 0 in digital pin 0 Program developed with mBlock5
77. 77 3. 6. 8 . 10 . - Get the remainder of a division (mo dulo) M odulo operation finds the remainder after division of one number by another (sometimes called modulus) . In the example, the value of A would be 1. 3. 6. 8 . 11 . - Round This block rounds a value . In the example, the value of A would be 2. 3. 6. 8 . 12 . - Diverse functions This block allows to perform different functions. Function Sample ABS Returns the absolute value of a number, that is, without the sign. ABS( - 1) = 1 Floor Round down FLOOR(1,8)=1 Ceiling R ound up CEILING(1,2)=2 SQRT Square root SQRT(4)=2 SI N Trigonometric function sine SIN(90º)=1 COS Cosine trigonometric function COS(90º)=0 TAN Trigonometric tangent function TAN(45º)=1 A RC SI N Arcsine = I nverse function of sine ASIN(1)=90 ° A RC COS Arccosine = I nverse function of cosine ACOS(0)=90 ° A RC TAN Arctangent = Inverse func tio n of tangent ATAN(1)=45 ° Ln Naperian logarithm function Ln 2. 71828 = 1 LOG L ogarithm to base 10 function Log 10 = 1 e^ E xponentiation function e^1 = 2.71828 10^ Powers of ten 10^2 = 100
114. 114 Steps = Steps + 1 Turn off LED number = LED LED = LED + 1 If LED greater than 12, then LED = 1 Turn on LED number = LED in yellow If Steps > Goal Execute Function F GoalReached Steps = 1 - - - - - - - - - - - - - - - - - - - - - - - - - - - - - - - - - Function F GoalReached Until button pressed Turn on all LEDS in red Wait 0.3 seconds Turn off all LEDS Wait 0.3 seconds Program developed with mBlock5
138. 138 Proposed pseudocode ( standard solution ) Forever Execute function FTemp Execute function FLEDS Function F Temp RAW = Read analog value from pin 3 ( temperature sensor ) TempC = RAW * 19 / 236 Function F LEDS LEDS = TempC * 1 2 / 40 I = 1 Repeat until I greater than LEDS Execute Function FColo u r Turn on LED = I with values Red , Green , Blue I = I + 1 Repeat until I greater than 12 Turn off LED I I = I + 1 Function FColo u r Brightness = 5 + (I * 20) Green = Brightness , Red = 0, Blue = 0 If I greater than 5 then Red = Brightness / 2 If I greater than 9 then Red = Brightness and Green = 0 Program developed with mBlock5
86. 86 Components used Proposed pseudocode Brightness = 100 On = - 1 Forever Execute function F BrightnessInc Execute function F BrightnessDec If On = 1 Turn On all LEDS in white with intensity = Brightness Else Turn Off all LEDS Wait for 0.2 seconds Forever If butto n pressed , On = On * ( - 1) Wait until button released Function F BrightnessInc If touch sensor 0 touched If Brightness less than 250 Brightness = Brightness + 5 Turn On LED 10 in green Wait for 0.1 seconds Function F BrightnessDec If touch sensor 1 touched If Brightness greater than 5 Brightness = Brightness - 5 Turn On LED 8 in red Wait for 0.1 seconds
148. 148 Components used The flame sensor has a potentiometer through which you can adjust its sensitivity (left = increase sensitivity, right = reduce sensitivity). Proposed pseudocode Alarm = 0, Brightness = 100 Forever Execute function F Fire Execute function F Alarm Function F Fire Turn on LED 1 in blue Fire = Read digital value pin 3 If Fire = 1 Alarm = 1 Turn on LED 1 in red Wait 0.2 seconds Turn off LED 1 Wait 0.2 seconds Function F Alarm If Alarm = 1 Repeat until button pressed Turn on all LEDS in Red Execute function FBeep Turn off all LEDS Execute function FBeep Repeat until Fire = 0 Execute function F Fire Alarm = 0 Function F Beep Repeat 50 times Write value 1 i n pin 0 Write value 0 i n pin 0
95. 9 5 Components used Proposed pseudocode On = - 1 Forever If On = 1 Execute function FLetter S Execute function FLetter O Execute function FLetter S Wait 2 seconds Else Turn off all LEDS Forever If button pressed On = On * ( - 1) If On = 1 Brightness = 100 Turn on LED 12 in green Else Brightness = 0 Turn on LED 12 in red Wait for button not pressed Function FLetter S Repeat 3 times Turn on all LEDS in white with Brightness = Brightness Wait 0.3 seconds Turn off all LEDS Wait 0.3 seconds Function FLetter O Repeat 3 times Turn on all LEDS in white with Brightness = Brightness Wait 0.6 seconds Turn off all LEDS Wait 0.3 seconds
153. 153 The delay time that we have set in our case, 10 seconds, may seem scarce, but note that in the objective description, this time is counted once the sensor failing detecting the person, therefore the light will be on while the person is passing, and wi ll continue for 10 seconds, once the sensor failing detecting it. Proposed pseudocode Execute function FInit Forever Execute function F DayNight Execute function FPIR Execute function FOnOff Execute function FLEDS Wait 1 second Function F Init Brightness = 100 Night = 0 Presence = 0 Time = 10 Function F DayNight AmbientLight = Read analog value pin 3 If AmbientLight less than 200 Then Night = 1 Else , Night = 0 Function F PIR Presence = Read digital value pin 0 If Presence = 1 Turn on LED 12 in red Wait 0.2 seconds Turn off LED 12 Function F OnOff If ( Night = 1) and ( Presence = 1) On = Time Function F LED S If On greater than 0 Turn on all LEDS in white and brightness = Brightness On = On – 1 Wait 0.1 seconds Turn on LED 6 in white and brightness = 50 Wait 0.1 seconds Else Turn off all LEDS
133. 133 4.3.3. - Twilight light A twilight light is a light that is located in transit areas, equipped with a sensor that turns it on automatically at dusk, and turns it off at dawn, thereby reducing day energy consumption. Objetive Complexity Carry out a twilight light that turns on automatically at dusk and goes out at dawn. Time 20’ Program: medium Components used Proposed pseudocode Brightness = 100 - - - - - - - - - - - - - - - - - - - - - - - - - - - - - - - - - Forever Execute function F DayNight If Night = 1 Turn on all LEDS in white and brightness = Brightness Else Turn off all LEDS Wait 1 second - - - - - - - - - - - - - - - - - - - - - - - - - - - - - - - - -
122. 122 Proposed pseudocode Execute function FWiFiConnect Forever Wait until button pressed Wait until No button pressed Execute function F ListenNumber Execute function F CheckNum Execute FLEDS Functio n F WiFiConnect Turn on all LEDS in red Connect with WiFi network in SSID ..... and key .... Wait until WiFi connected Turn on all LEDS in green Wait 0. 3 seconds Turn off all LEDS Function F ListenNumber Turn off all LEDs Turn on LED 12 in green Text = Recognize voice English language during 4 seconds Turn off LED 12 Function F CheckNum LED = 0 If Text contains “1”, then LED = 1 If Text contains “2”, then LED = 2 If Text contains “3”, then LED = 3 If Text contains “4”, then LED = 4 If Text contains “5”, then LED = 5 If Text contains “6”, then LED = 6 If Text contains “7”, then LED = 7 If Text contains “8”, then LED = 8 If Text contains “9”, then LED = 9 If Text contains “10”, then LED = 10 If Text contains “11”, then LED = 11 If Text contains “12”, then LED = 12 Function F LEDS If LED = 0 Turn on all LEDS in red Wait 0.3 seconds Else I = 1 Repeat until I greater than LED Turn on LED = I in green I = I + 1 Wait 0.1 seconds
105. 105 Sound Level = microphone volume Brightness = Sound Level Colour = round ( Sound Level / 25) - - - - - - - - - - - - - - - - - - - - - - - - - - - - - - - - - Function FColour Red = 0, Green = 0, Blue = 0 If Colour = 1, then Red = Brightness If Colour = 2, then Green = Brightness If Colour = 3, then Blue = Brightness If Colour = 4, then Red = Brightness and Green = Brightness - - - - - - - - - - - - - - - - - - - - - - - - - - - - - - - - - Function F LED S LED = LED + 1 If LED greater than 12, then LED = 1 LED2 = LED Rep eat 4 times Turn on LED = LED2 with Red , Green and Blue LED2 = LED2 + 3 If LED2 greater than 12, then LE D 2 = LED2 – 12 Program developed with mBlock5
130. 130 Components used Proposed pseudocode On = - 1 - - - - - - - - - - - - - - - - - - - - - - - - - - - - - - - - - Forever Execute function FBut t on Execute function FOnOff - - - - - - - - - - - - - - - - - - - - - - - - - - - - - - - - - Function FBu t ton If button pressed On = On * ( - 1) Wait until button not pressed - - - - - - - - - - - - - - - - - - - - - - - - - - - - - - - - - Function F OnOff If On = 1 Potentiometer = analog value from pin 3 Brightness = round ( Potentiometer * 255) / 1023 Turn on all LEDs in white and brightness = Brightness Else Turn off all LEDS
113. 113 Objetive Complexity Carry out a wrist pedometer with Halocode capable of indicating and count each step taken. Once the target is reached, it will warn b y flashing the LEDS in red. Time 20’ Program: medium Components used The key of the algorithm that we propose is to take advantage of the swing of the arm that is made when walking and detect when it changes direction, which in turn will cause the change of sign in the value of the acceleration in the X axis. Proposed pseudocod e Steps = 0, LED = 1, Brightness = 50 , Goal = 10000 Forever Execute function FWait Ac c elX Neg Execute function FWait Ac c elX Pos Execute function FStep - - - - - - - - - - - - - - - - - - - - - - - - - - - - - - - - - Function FWait Ac c elX Neg Wait until acceleration X axis less than 0 Turn on LED number = LED in red - - - - - - - - - - - - - - - - - - - - - - - - - - - - - - - - - Function FWait Ac c elX Pos Wait until acceleration axis X greater than 0 - - - - - - - - - - - - - - - - - - - - - - - - - - - - - - - - - Function FStep
118. 118 Proposed pseudocode Execute function FWiFiConnect Forever Wait until button pressed Wait until button not pressed Execute function F ListenColor Execute function F ShowColo u r - - - - - - - - - - - - - - - - - - - - - - - - - - - - - - - - - Functio n F WiFiConnect Turn on all LEDS in red Connect with WiFi network in SSID ..... and key .... Wait until WiFi connected Turn on all LEDS in green Wait 0. 3 seconds Turn off all LEDS - - - - - - - - - - - - - - - - - - - - - - - - - - - - - - - - - Function F ListenColor Turn on LED 12 in green Text = Recognize voice English language during 3 seconds Turn off LED 12 - - - - - - - - - - - - - - - - - - - - - - - - - - - - - - - - - Function F ShowColo u r If Text contains “red” Turn on all LEDS in red If Text contains “green” Turn on all LEDS in green If Text contains “blue” Turn on all LEDS in blue If Text contains “yellow” Turn on all LEDS in yellow If Text contains “orange” Turn on all LEDS in orange If Text contains “white” Turn on all LEDS in white If Text contains “off” Turn off all LEDS
104. 104 Components used Proposed pseudocode Execute function FInit Forever Execute function FTouch0 Execute function FTouch1 Execute function F Sound Level If Sound Level greater than Level Min Execute function FColour Execute function FLEDS Wait 0.1 seconds Turn off all LEDS - - - - - - - - - - - - - - - - - - - - - - - - - - - - - - - - - Function F Init LED = 0, Level Min = 20 Turn off all LEDS - - - - - - - - - - - - - - - - - - - - - - - - - - - - - - - - - Func t i o n F Touch0 If contact sensor 0 touched Repeat until contact sensor 0 no touched If Level Min less than 50 Level Min = Level Min + 1 Turn on LED 10 in green Wait 0.1 seconds Turn off all LEDS - - - - - - - - - - - - - - - - - - - - - - - - - - - - - - - - - Func t i o n F Touch1 If contact sensor 1 touched Repeat until contact sensor 1 no touched If Level Min greater than 5 Level Min = Level Min - 1 Turn on LED 7 in red Wait 0.1 seconds Turn off all LEDS - - - - - - - - - - - - - - - - - - - - - - - - - - - - - - - - - Function F Sound Level
Views
- 806 Total Views
- 716 Website Views
- 90 Embeded Views
Actions
- 0 Social Shares
- 0 Likes
- 0 Dislikes
- 0 Comments
Share count
- 0 Facebook
- 0 Twitter
- 0 LinkedIn
- 0 Google+
Embeds 2
- 6 51.83.143.171
- 3 uus.insplay.eu
-
mBot2 Getting Started Activities
1386 Views . -
Codey Rocky Projects
1227 Views . -
cyberpi_block_based_coding_basic_course_material
1021 Views .

-
Blue-Bot roboti õpetajajuhend
4781 Views . -
Dash ja Dot õpetajajuhend - kuidas alustada
4507 Views . -
Bee-Bot õpilugude raamat
4485 Views . -
Easi-Scope juhtmevaba mikroskoobi õppejuhend
3979 Views . -
LEGO MakerSpace juhend
3496 Views . -
45024 LEGO Education STEAM Park infoleht
3398 Views . -
-
Robootika töötuba: LEGO WeDo 2.0 ja BOOST
3191 Views . -
Codey Rocky juhend
3177 Views . -
-
Programmeeritav maastikurobot - TTS
3096 Views . -
Sphero BOLT
2971 Views . -
Cue õpetajajuhend
2930 Views . -
Sphero BOLT kasutusjuhend
2919 Views . -
InO-Bot roboti õppejuhend
2905 Views . -
LEGO Education Coding Express õpetajajuhend
2862 Views . -
Pro-Bot
2809 Views . -
Ozobot Evo
2729 Views . -
-
Digivihik.ee: miks liituda?
2720 Views .